go2rtc 3D printer installation and config guide
1. Installation
I have created go2moon - a simple script and a redistribution of go2rtc that allows you
to install it and manage updates through Moonraker. Sadly, the only way that could let you manage go2rtc from its official
repo is to use the executable type of Moonraker updater which is unsupported in both Fluidd and Mainsail.
The script I have made will: - download the newest release, - create a system service that automatically starts go2rtc on boot, - automatically selects the correct architecture (32/64 bit, x86/ARM) - sets up the Moonraker updater and allows Moonraker to restart go2rtc on update, - creates a default config.
Additionally, the repository automatically fetches the go2rtc's newest release and packs it in a Moonraker-compatible way.
DO NOT RUN THE FOLLOWING COMMAND DURING PRINTING. It will restart Moonraker. It will kill your print.
You have been warned.
Run the following command to install go2rtc:
This is it for the installation part. I swear! go2rtc should be running now.
You will find the configuration panel under http://<printer_ip>:1984.
2. Configuration
2.1 Camera-specific configuration
This will depend on the type of camera you have. The steps are a bit different for USB and CSI cameras.
USB camera
Go to http://<printer_ip>:1984/add.html and find the position named "FFmpeg Devices (USB)".
Click on it. It should look more or less like this:
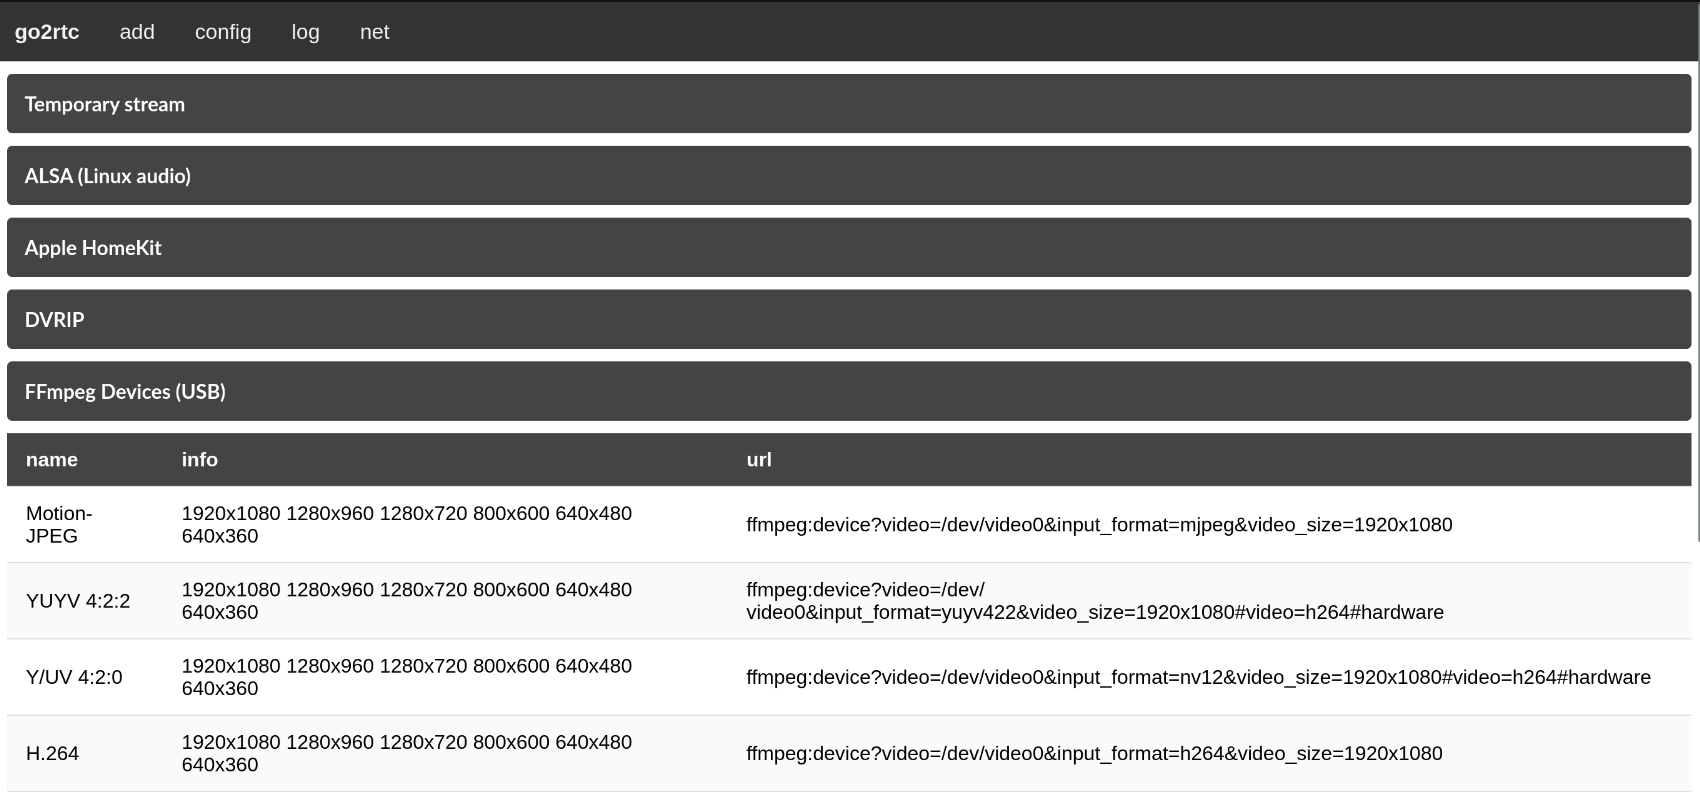
If that list contains H.264 for you, congrats - your camera supports H.264 natively, meaning that
you do not need to re-encode the video. In turn, that means that your resource usage will be extremely low
when streaming - even without a hardware encoder. If it does not contain H.264, select any other format you wish.
Copy the URL string from the selected format. Go to the config tab and at the bottom of the file, add the following:
<camera_name> can be any descriptor of the camera, especially if you have plan to have more than one camera.
If you selected the H.264 url, at the very end, append #video=copy to it.
The final product should look somewhat like this:
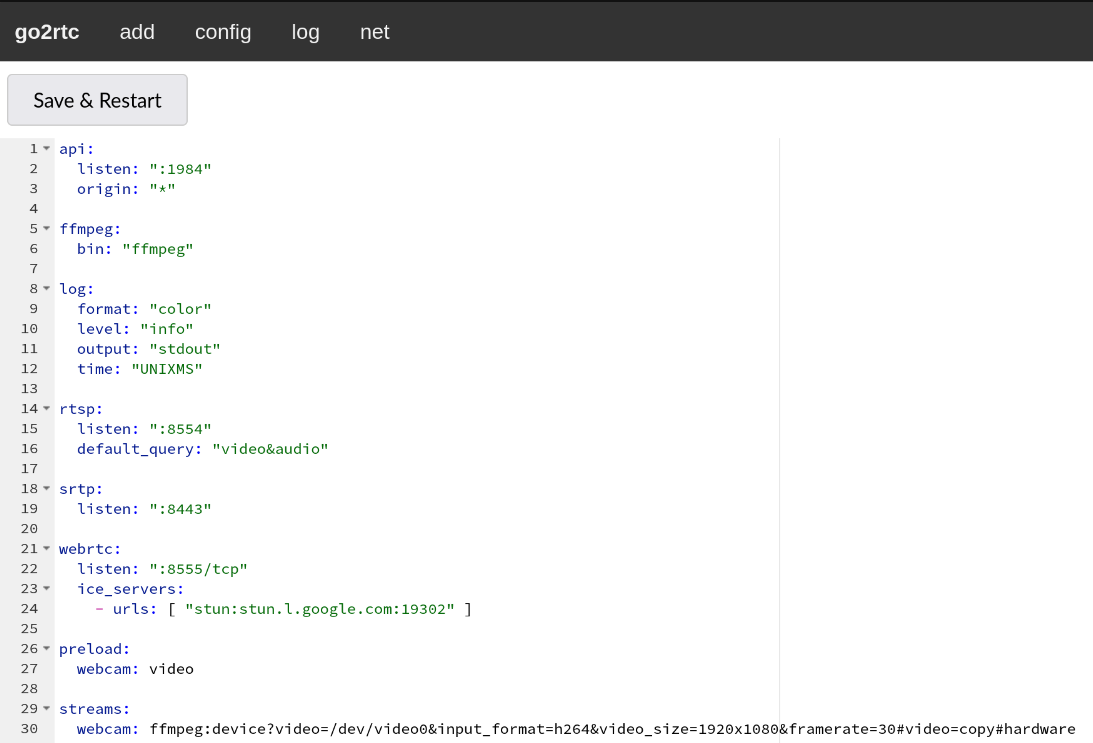
Click on Save & Restart, then click on go2rtc, then verify your webcam appeared there.
If so, click on stream. If the stream shows, congratulations - the worst part is done!
CSI (Raspberry Pi) camera
Help needed
I do not own any CSI cameras, therefore the following is purely theoretical. If you verify that it works or have any issues, please contact me on the Voron server and I will be happy to help, debug the issue with you and update the guide.
Go to http://<printer_ip>:1984/config.html. Add the following to your config:
Sadly, with CSI cameras, you will always need to encode the video on your hardware.
2.2 Adding your camera to Moonraker
Instead of adding your camera to Fluidd or Mainsail, you can just configure it in Moonraker. Add the following to moonraker.conf:
[webcam <name>]
service: webrtc-go2rtc
target_fps: 30 # 15 by default
stream_url: http://<printer_ip>:1984/stream.html?src=<camera_name>
snapshot_url: http://<printer_ip>:1984/api/frame.jpeg?src=<camera_name>
flip_horizontal: False
flip_vertical: False
rotation: 0 # May be 0, 90, 180, or 270. The default is 0.
aspect_ratio: 16:9 # Delete for 4:3 cameras
Save and restart Moonraker. Your camera should be now displayed in your frontend of choice.